


Kullanım Kılavuzu
1 Introduction2 General view
3 Entering coins
4 View Coins
5 Managing a collection file
6 Reports
7 References
8 Settings
9 Image Editor
1 Giriş
1.1 Açıklama
OpenNumismat is a handy and reliable application designed for numismatists and coin collectors, to create a numismatic collection.
OpenNumismat ile kendi madeni para kataloglarınızı her bir öğe için ayrıntılı açıklamalar ve fotoğraflar ile oluşturabilir, organize edebilir ve yönetebilirsiniz.
OpenNumismat tamamen ücretsiz olarak dağıtılmaktadır. Kaynak kod GPL-3.0 altında lisanslanmıştır ve GitHub'da mevcuttur.
Official website is located at https://opennumismat.github.io.
1.2 Uygulamanın özellikleri
OpenNumismat is based on the PySide6 library with the SQLite database engine to store the data collection, which allowed to achieve lightness and responsiveness of the interface and cross-platform.
A complete list of the used components and libraries is available here.
Icons used in the interface, based on the LED Icon Set v1.0, Soft Scraps Icons by deleket and Flag icons.
Translation of the interface implemented by enthusiasts using the service Transifex. Thank you for the help!
1.3 Lisans
OpenNumismat is free software: you can redistribute it and/or modify it under the terms of the GNU General Public License as published by the Free Software Foundation, either version 3 of the License, or (at your option) any later version.
OpenNumismat is distributed in the hope that it will be useful, but WITHOUT ANY WARRANTY; without even the implied warranty of MERCHANTABILITY or FITNESS FOR A PARTICULAR PURPOSE. See the GNU General Public License for more details.
You should have received a copy of the GNU General Public License along with OpenNumismat. If not, see https://www.gnu.org/licenses/.
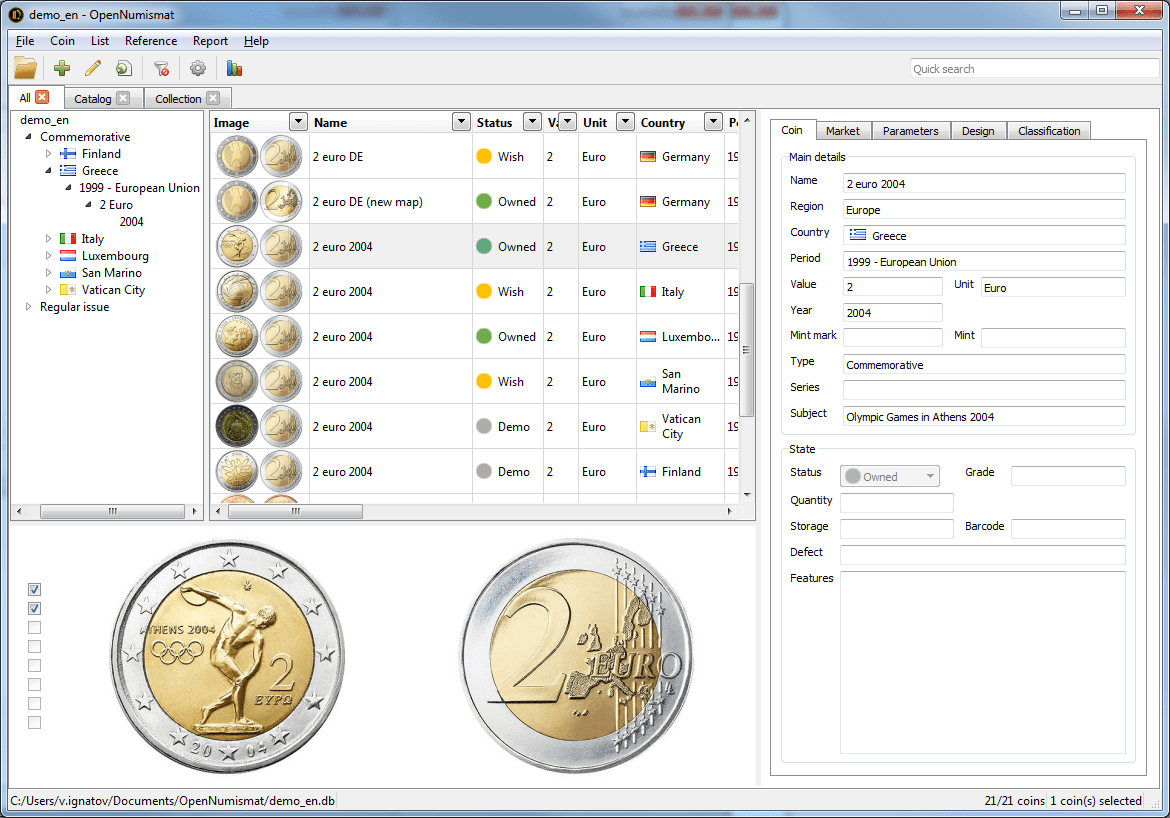
2 Genel Görünüm
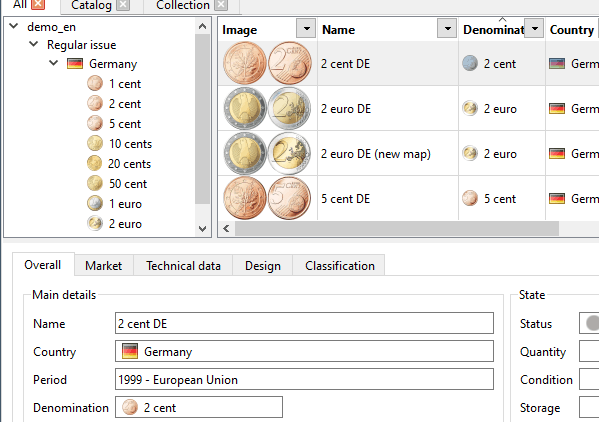
Uygulamayı ilk başlattığınızda, ana pencere bir demo koleksiyonuyla açılır:
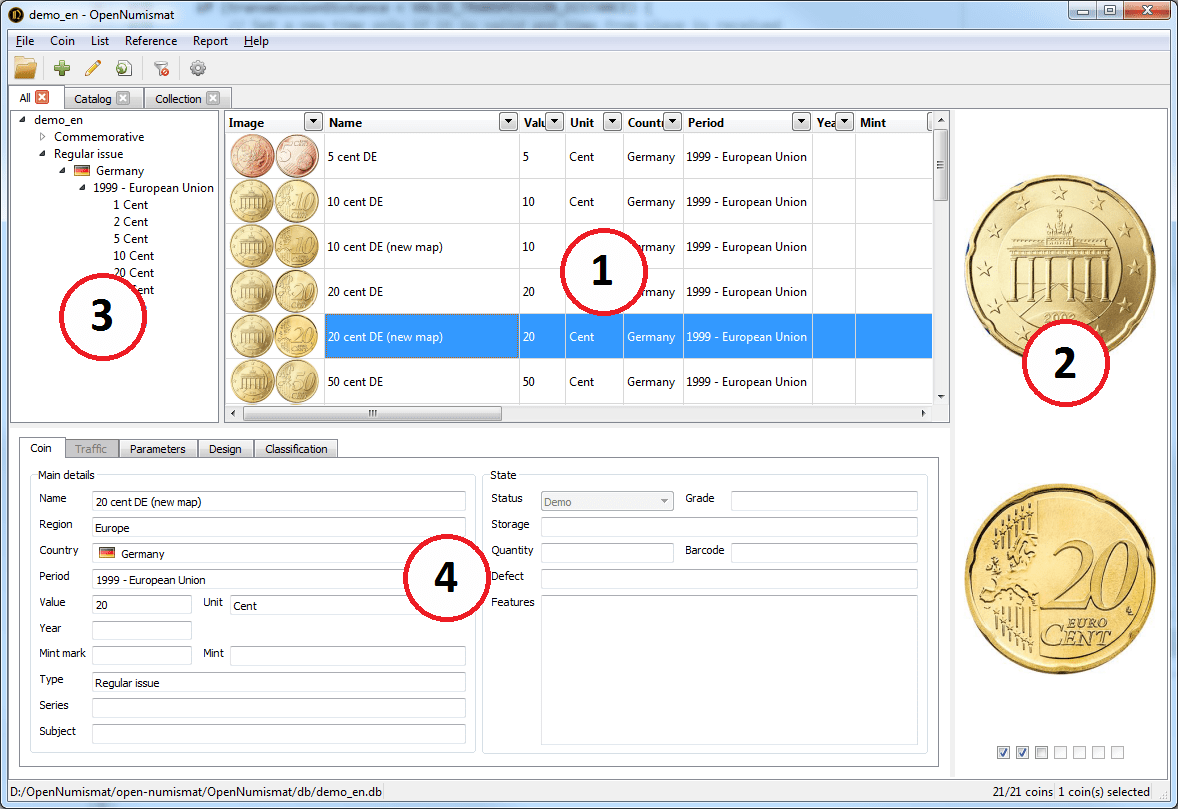
Ana pencere aşağıdaki ana unsurlardan meydana gelir:
- Madeni para tablosu
- Görsel paneli
- Ağaç
- Bilgi paneli
When you click on any coin in the Table of coins, detailed information is displayed: in the Image panel - coin photographs, the Tree unfolds to the element describing the coin, the Info panel displays all the entered coin data.
Yeni boş bir koleksiyon oluşturabilir veya demo koleksiyonlara yeni veriler kaydederek düzenleyebilirsiniz.
2.1 Table of coins view
You can change the view of Table of coins by menu View → Change view
2.2 Details panel
You can switch Info panel to Statistics or Map by menu View → Details

3 Madeni paraların kaydedilmesi
3.1 Madeni para ekleme
Manage your collection by adding entries about every bought, sold or wished coin.
To add a new coin, select the Record → Add menu or press the Ins key. After that, the Edit dialog opens:

The Edit dialog contains 7 tabs with the following fields:
- Overall - Main details:
- Category - type of collectable item;
- Name - a descriptive name of the coin (can be automatically created from the remaining fields by clicking the "Generate" button);
- Bölge;
- Ülke;
- Period - period in the history of the country or coinage period;
- Emitent;
- Hükümdar;
- Value *;
- Unit *;
- Year - gregorian year;
- Year on coin;
- Darphane;
- Darphane işareti - darphane tarafından basılan sembol veya işaret;
- Tip;
- Seri - hatıra paraların bir serisi;
- Subject - an event or object to which a commemorative coin is dedicated.
- Overall - State (state of coin from the collection):
- Status - the main characteristic that determines the presence of a coin in the collection. The coin status affects the availability and content of the Market tab. Available values (can be renamed from Settings):
 Demo - an existing item that is not present and is not needed in the collection;
 Bidding - an item that is currently being bid on;
 Ordered - an object that has been ordered;
 Owned - an object that is owned in the collection;
 Duplicate - copy or spare item of the collection;
 Replacement - an item that is for exchange with a better item;
 Sold - item that has been sold;
 Wish - an object that is desired for purchase;
 Sale - an item that has been put up for sale;
 Missing - an item that is missing from the collection (stolen or lost);
 Pass - object that is under watched in auction or store.
 - Grade - the degree of coin wear;
- Quantity - the number of duplicates or coins in the roll;
- Format - destribution format (single coin, set or roll);
- Kondisyon;
- Seat - a seat of the coin in the storage;
- Depolama - Madeni paranın bulunduğu konumun açıklaması;
- Barkod;
- Grader;
- Defect - a description of the mint-made error;
- Özellikler.
- Status - the main characteristic that determines the presence of a coin in the collection. The coin status affects the availability and content of the Market tab. Available values (can be renamed from Settings):
- Market - Buy:
- Tarih;
- Fiyat;
- Ödenen - komisyonu içeren son fiyat
- Commission - additional costs associated with the acquisition of a coin (auction fee and/or shipping cost). It is allowed to enter the commission amount, as well as the percentage of the price (for example, 10%). The field is available only in the coin editing window;
- Satıcı;
- Yer;
- Invoice - link to the purchase invoice document on disk or URL;
- Bilgi.
- Market - Sale:
- Tarih;
- Fiyat;
- Bailed - the total received amount after commission;
- Commission - additional costs associated with the acquisition of a coin (auction fee and/or shipping cost). It is allowed to enter the commission amount, as well as the percentage of the price (for example, 10%). The field is available only in the coin editing window;
- Satın Alan;
- Yer;
- Invoice - link to the sales invoice document on disk or URL;
- Bilgi.
- Harita
- Address;
- Latitude;
- Longitude;
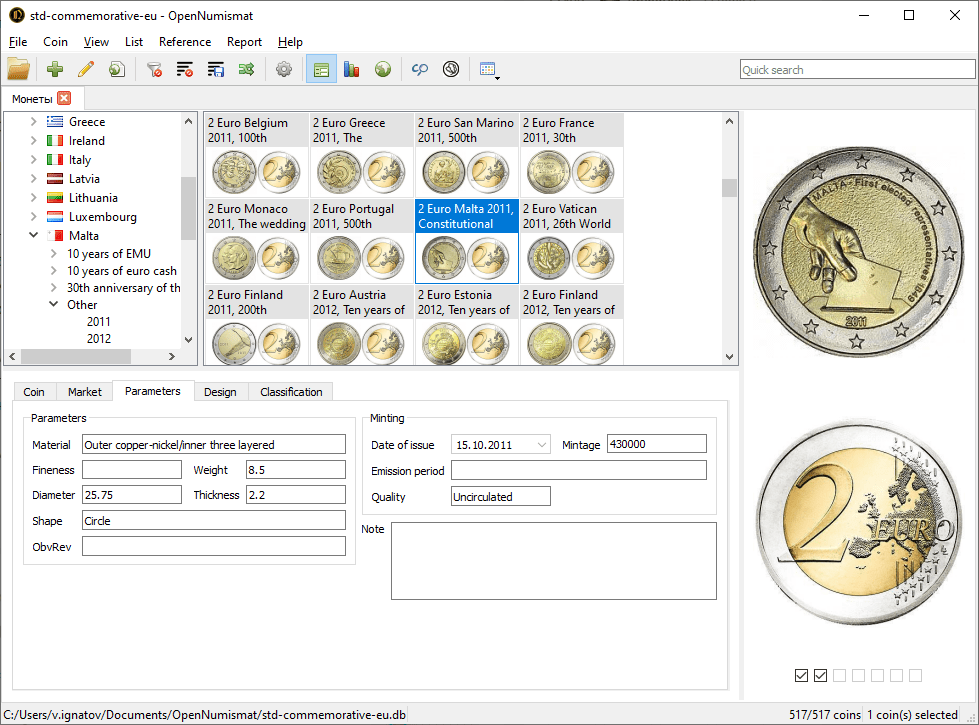
- Technical data - Parameters (physical parameters of the coin):
- Composition;
- Metal;
- Material 2;
- Fineness - available formats 0.999, 999, 9995, 999.5;
- Ağırlık;
- Çap;
- Kalınlık;
- Width;
- Height;
- Şekil;
- Obv/Rev - the ratio of obverse and reverse (medal, coin).
- Technical data - Specificity:
- Diameter - real coin diameter;
- Weight - real coin weight;
- Die Axis - describes how the obverse and reverse dies were aligned to each other when the coin was struck. Most often expressed in degrees, but can also be expressed as the face of a clock in hours;
- Modification.
- Technical data - Minting (coin release data):
- Veriliş tarihi
- Baskı Adedi;
- Emission period;
- Kalite - baskı tekniği;
- Not.
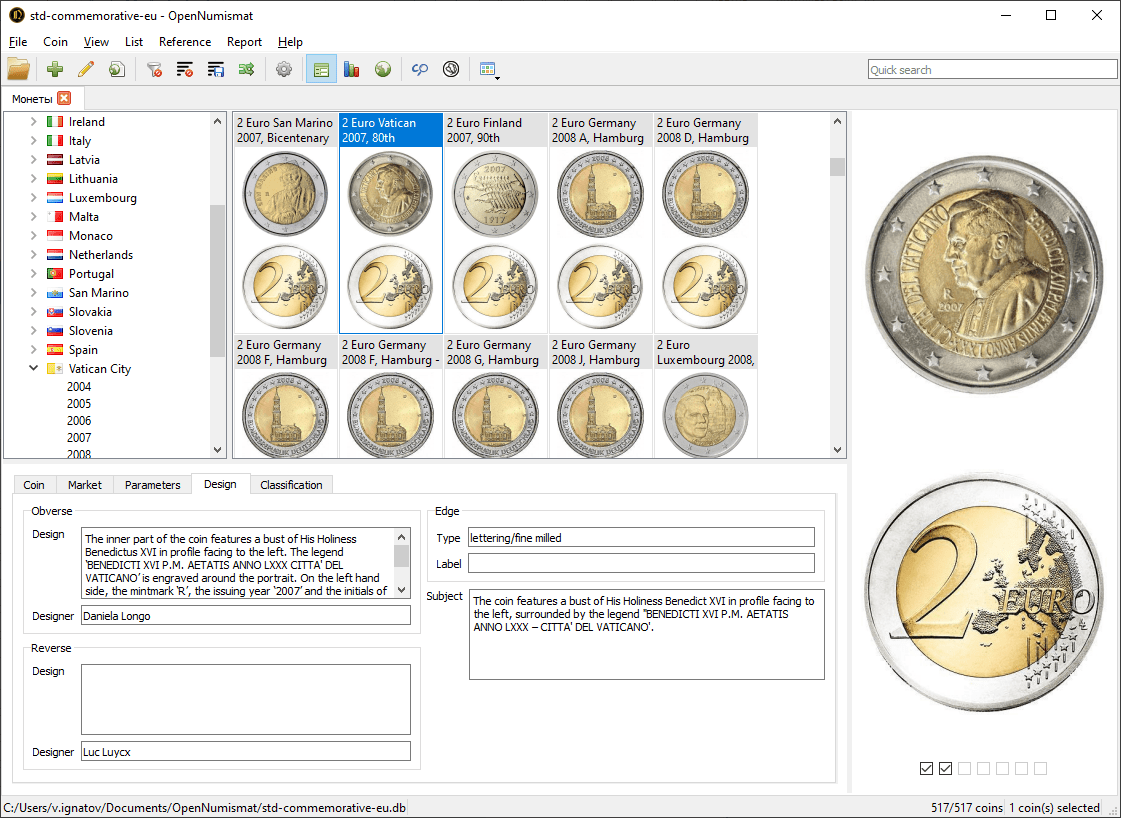
- Tasarım (madeni para tasarımının açıklaması)
- Ön yüz - ön yüz görseli;
- Tasarım (ön yüz)
- Tasarımcı (ön yüz)
- Gravürcü (ön yüz)
- Renk (ön yüz);
- Reverse - the reverse image;
- Tasarım (arka yüz);
- Tasarımcı (arka yüz);
- Gravürcü (arka yüz);
- Renk (arka yüz);
- Edge - the image of the edge or the banknote signature;
- Type - type of coin edge or title of the banknote signatory;
- Label - label on the coin edge or banknote signatory name;
- Signature - the image of the banknote signature;
- Type - type of coin rim or title of the banknote signatory;
- Signature - banknote signatory name;
- Subject - a description of the topic or event to which the coin is dedicated or its design;
- Sınıflandırma;
- 1#, 2#, 3#, 4# - catalog numbers for a coin;
- Nadirlik;
- İyi - F-12, F-15 durumundaki bir madeni paranın yaklaşık fiyatı;
- Çok iyi - VF-20, VF-25, VF-30, VF-35 durumundaki bir madeni paranın yaklaşık fiyatı;
- Çok çok iyi - EF-40, XF-45 durumundaki bir madeni paranın yaklaşık fiyatı;
- Çil - MS-60 ve üzeri durumdaki madeni paranın yaklaşık fiyatı;
- Variation, Obverse, Reverse, Edge - a brief description of the variety of the coin, its obverse, reverse and edge;
- URL - web-link to information about the coin or to a file on the disk.
- Görseller;
- Photo 1, Photo 2, Photo 3, Photo 4, Photo 5, Photo 6 - 6 additional photos or images. You can add specific title for an image by double-click on image title or right click on image.
- System (not editable, can be displayed only in the Table of coins):
- ID - Koleksiyondaki madeni paraların kendine özgü numarası;
- Position - default sort order in Table of coins;
- Created - date the coin was added;
- Updated - the date of the last editing of the coin;
- Image - an optimized image of the obverse and the reverse of the coin for output in the Table of coins.
For some fields, values can be obtained from the reference (see 7):

In the Settings dialog, you can remove some of the unused fields (see 8).
* You can disable the Value field and rename the Unit field to Denomination in the Settings dialog. Then you can add denomination icons through the reference:
Some fields (such as Value, Year, Quantity, Price, Fineness, Weight, Diameter, Mintage) are for entering only numeric values. To enter values in the expanded format ("BC" in the Year field, fractions in the Nominal field, range in the Weight field, etc.) in these fields, you must enable the Free format numeric fields in the Settings dialog.
Text fields (such as Subject, Features, Description, Note) support links:

3.1.1 Görselleri düzenleme
The application supports up to 11 images of each coin.
The following image formats are supported: BMP, GIF, JPEG, PNG, TIFF, WEBP. Images are saved in WebP format with transparency. Large images are compressed so that the maximum side does not exceed 1024 pixels (you can change it in the Settings dialog).
To insert or change an image, right-click on the field and select one of the drop-down menu items:
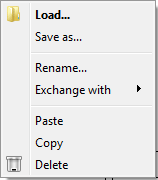
- Yükle... - Disk üzerinde görsel dosyası seç;
- Save as... - saves the image to a file on disk;
- Rename... - set a unique name for the image that will be displayed in the tooltip of the image panel (see 4.2);
- Exchange with - swaps two images;
- Paste - paste an image from the clipboard (it can be a graphic file, an image copied from a image editor or a web link);
- Copy - copies the image to the clipboard for later paste into the image editor;
- Delete - deletes the current image.
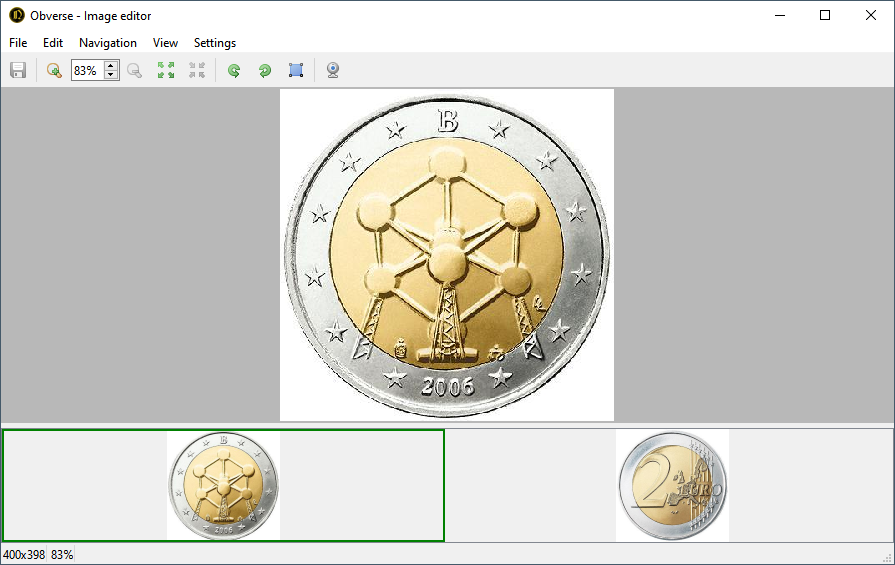
Double clicking on the image field opens the file selection window if the image is not yet installed, or opens the image in the Image Editor (see 9) or in the standard image viewer of your OS.
The coin image in the Table of coins is automatically generated from the obverse and reverse images.
3.2 Madeni parayı düzenleme
To edit the coin data, you need to double-click on the required coin, right-click on the desired coin and select Edit..., select the coin and press Enter key or select the Record → Edit... menu. After that, the Edit dialog will be opened, described in 3.1.
3.3 Madeni paraları çoğaltma
To quickly add a similar coin, you can use cloning. To do this, right click on the coin and select Clone. The Edit window filled with information about the new coin will open, edit the required fields and save.
You can also copy (using Ctrl + Ins or Ctrl + C) the existing coin and paste it (by pressing Shift + Ins or Ctrl + V) - the Edit dialog will also open.
A copied coin or coin group (see below) can be inserted into a third-party application (for example, MS Excel or Notepad). In this case, when inserting into a third-party application, only text fields (without images) will be copied.
You can also add a new coin with pre-filled fields from the Tree. To do this, right click on the Tree element and select Add new coin.... In the opened Edit dialog all common fields for coins corresponding to this element will be filled.
3.4 Madeni paraları çoklu düzenleme
Sometimes you need to change some fields at once for several coins. To do this, select the required coins (to select several coins, use the click with the Shift or Ctrl key pressed, to select all the coins, press Ctrl + A), right-click on the selected coin group and select Multi edit... or the Record → Edit... menu.
In the opened Edit dialog, all matching fields for the selected coin group will be filled. Each field will have a checkbox that allows or denies the application of the field value to the whole group of coins when saving:
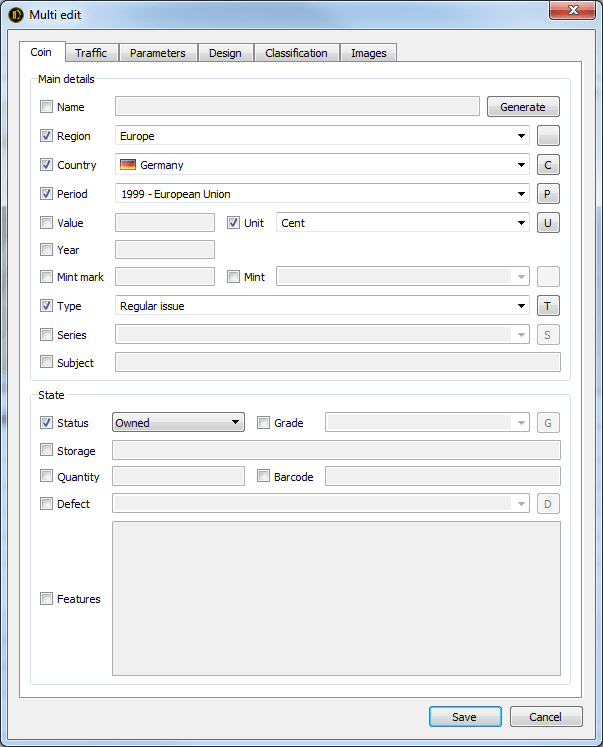
Also, group editing is available from the Tree - right-click on the tree element and select Edit coins....
3.5 Kaldırma
You can remove coins from the collection one by one or by a group. To delete, select the Record → Delete menu, right-click on the selected coin or coin group and select Delete or press the Del key.
Removed coins are removed from the collection at once and can not be repaired - be careful.
4 View Coins
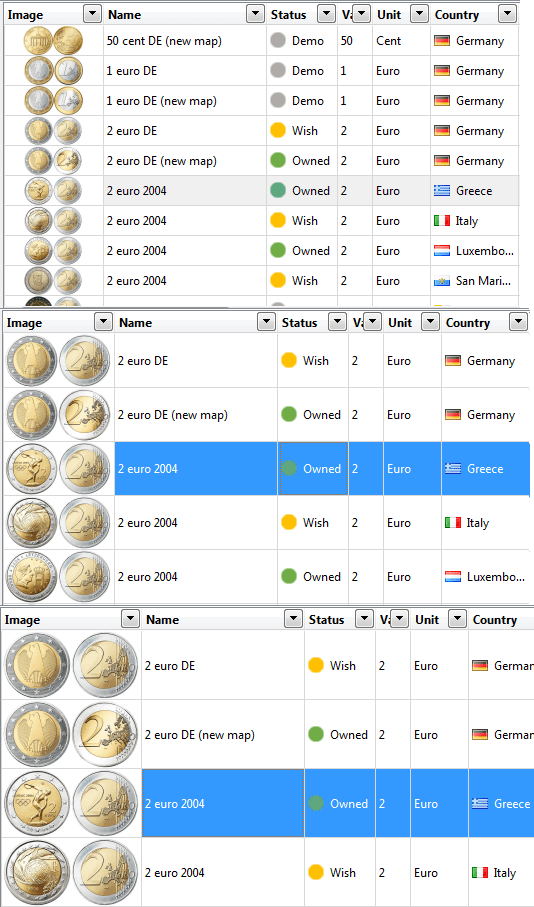
4.1 Madeni para tablosu
The Table of coins is the central element of the application, serves to display coin data according to those selected with the settings.
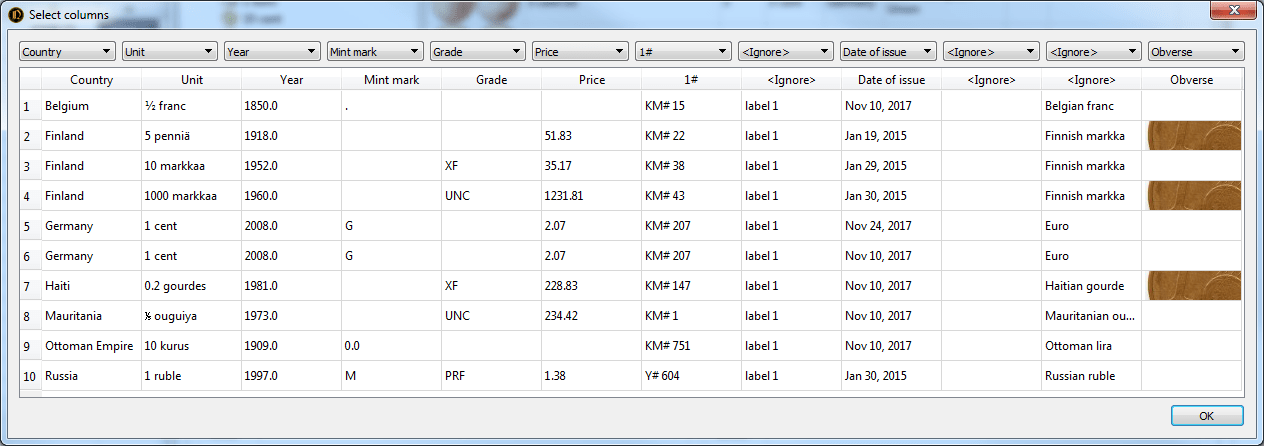
The number and location of fields can be set in the List → Select columns... menu or by right-clicking on the table header and selecting Select columns....
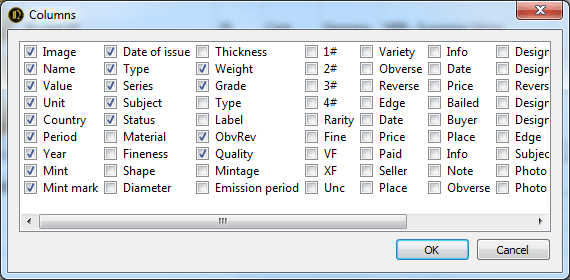
In the opened dialog, it is necessary to mark the fields of interest. Dragging the names of fields with a mouse can change the location of the fields relative to each other. You can also drag field headers directly into the coin table. Clicking on the field header sorts the table according to the selected field.
You can control the width of a column in a table by expanding the border of the column heading with the mouse or by right-clicking on the header and selecting Adjust size.
4.2 Görsel Paneli
This panel displays images tied to the coin. At the bottom of the panel are checkboxes allowing you to control the number of simultaneously displayed images.
Double-clicking opens the imagen in the Image Editor (see 9) or in the standard image viewer of your OS. When you hover your mouse over an image, a unique image name is displayed, if it was specified when editing the coin.
4.3 Filtre
Using the menu in the column headings of the table, you can filter coins by the value of the fields.
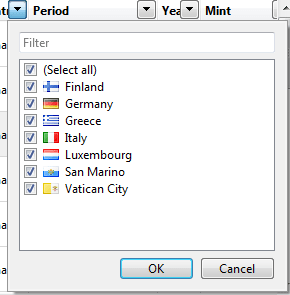
The Filter menu contains all column values. Marked values will be displayed, the rest will be hidden. To mark all items or remove marks from all values, select (All). At the top of the menu is a field that allows you to filter out the menu values.
To reset all filters in the current list, click the Clear all filters button on the toolbar:
![]()
4.4 Ağaç
The tree on the left side of the application window allows you to group coins by field values. When selecting a tree element, the coins corresponding to the selected value are displayed in the table.
To customize the Tree, click List → Customize tree... menu or right-click on the tree element and select Customize tree...:
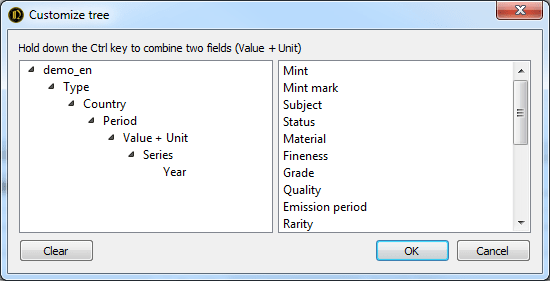
In the opened dialog you can change the structure of the tree by dragging the elements with the mouse. Items that are dragged from right to left are added to the end of the tree. Dragging last item from left to right removes it from the tree. To combine two fields (for example, Value+Unit), hold down the Ctrl key while dragging.
4.5 Listeler
The lists allow you to have several independent collection views. Each list stores its own settings for fields, columns, filters and tree. This allows the lists to be used as permanent filters.
Add a new list by clicking on the List → New... menu or by double-clicking on the list panel (from the empty space next to the headings of the existing lists) and entering the name of the new list. You can also create a copy of the existing list by right-clicking on the source list and selecting Clone.
You can change the name of the list by selecting the List → Rename... menu or by right-clicking on the list title and selecting Rename....
Closed lists are not deleted and are available in the List → Open menu. To permanently delete private lists, select the List → Open → Remove all menu.
4.6 Durum göstergesi
At the bottom of the application window there is a status bar showing the name and path to the collection file, the total number of coins in the collection and in the current Table of coins, the number of coins in the selected group.

5 Bir koleksiyon dosyasını yönetme
The collection file is a regular file with the extension .db and stores all data about the collection including images other than references (see 7). You can copy, move, delete and rename it by means of your OS.
5.1 Oluşturma/Açma
To create a new collection, select the menu File → New.... In the dialog that opens, select the location and name of the new collection file.
To open an existing collection file, select the File → Open... menu and select the desired file. You can also associate collection files (for example, if you select the appropriate option when installing the application) and open them automatically when you "call" from the file manager.
The File menu displays up to 7 recently opened collections available for quick opening.
5.2 Yedekleme
To prevent data loss of the collection due to hardware, software, human errors, as well as the work of malicious programs, it is recommended to perform a backup. To create a backup copy of the collection, select the menu File → Backup. This will create a copy of the current collection with the date and time stamp added (for example, demo_171025115112.db for the copy made at 11:51:12 on 25/10/2017) in the directory specified in the settings. To restore the data, just rename the backup file by deleting the time stamp. You can also copy the collection file using your OS.
Note: It is recommended to store backups on a physical medium other than the worker. Choosing a cloud storage, such as Dropbox, can be a good option. It is also important to make backup copies on a regular basis, before or after making a large number of changes (see 8.1).
5.3 Sıkıştırma
In view of the peculiarities of SQLite implementation, which provides storage of collection data, memory is not automatically released when data is deleted in the collection file. Over time, this can lead to an increase in the size of the collection file, its fragmentation and slowdown of the application. If necessary, you can reduce the size of the collection file by releasing unnecessary "empty" space by selecting the File → Vacuum menu.
5.4 Şifre
In the menu File → Set password... you can set the password that will be requested each time the collection is opened.
Note: data encryption is not carried out, so the password protection cannot be considered complete.
5.5 Synchronization
Changes made in multiple copies of a collection file can be merged safely with the menu File → Synchronize....
The most important properties of the synchronization algorithm:
- All new entries will be added (detected by Created field) to opened collection.
- Entries with the same value of ID and Created field will be updated when Updated field value is less in opened collection.
5.6 Importing
OpenNumismat allows you to import data from collections created in another software (MS Excel, CoinManage, Collection Studio and Tellico) or sites (Colnect, Numista and uCoin.net).
For importing from MS Excel select the menu File → Import → Excel and select the source file. After that, the dialog for assigning fields with the first 10 coins from the source file will be opened:
6 Raporlar
6.1 Rapor oluşturma
The application supports the generation of reports on templates. You can edit existing ones or create your own report templates.
The generated report can be printed or saved in HTML, PDF, MS Word formats from the Preview dialog.
To create a report, you need to select the coins for which data will be included in the report and open the Preview dialog by selecting the Report → Report... menu:
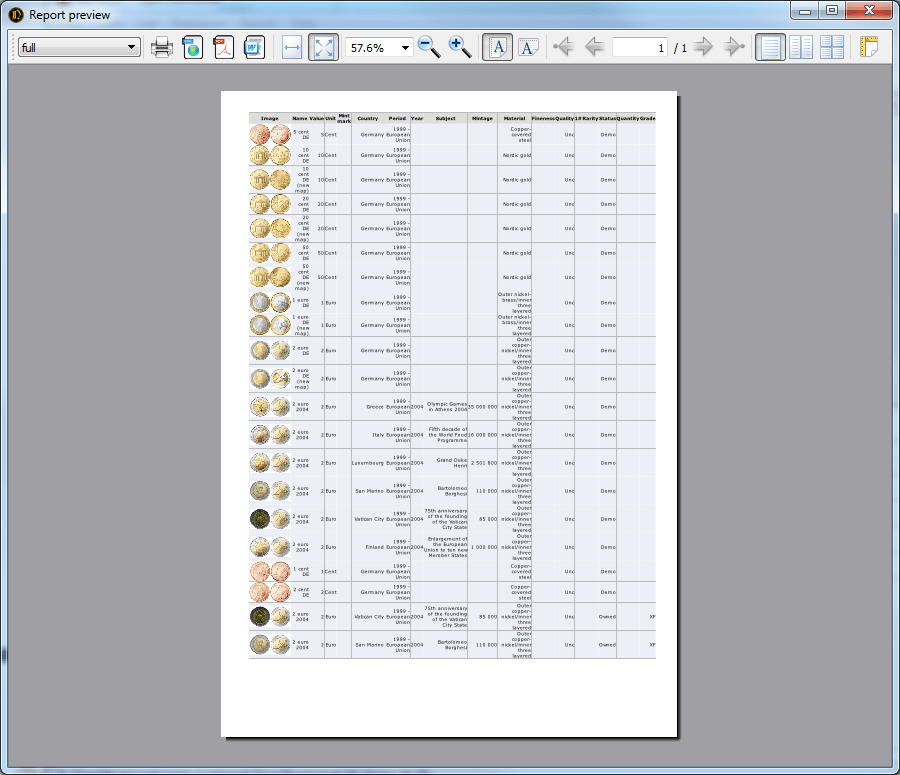
In the Preview dialog, you can select a report template (the left list on the toolbar), control the preview mode, and print or save the report to a file of the desired format (right buttons on the toolbar).
Note: Preview dialog use old library for generating HTML. So reports in preview may be corrupted and do not match the view in modern browsers. Also it may crash when generating large reports (more than 100 coins). For viewing and printing you can use Quick report (see 6.2) for open report in your browser.
6.2 Hızlı rapor
By selecting the Report → View in browser menu, you can quickly view the report for the selected coins in HTML format. The report will be opened in the system browser.
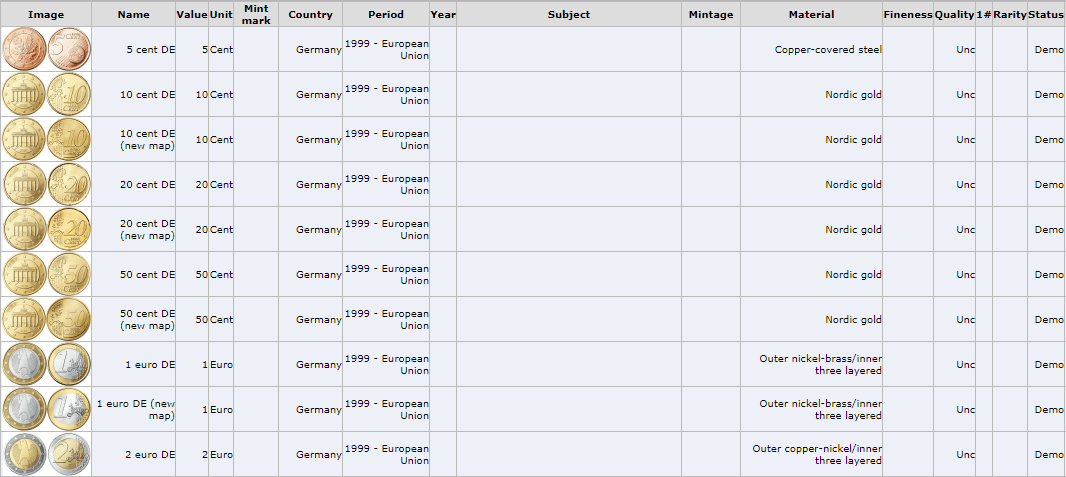
For a quick report, used the template set in the Settings dialog as the Default template.
6.3 Şablonları Düzenleme
To edit templates you need to have basic HTML skills. The engine for generating template reports is based on the open-source Jinja2 library. The reports are generated in UTF-8 encoding and, accordingly, the templates should be in the same encoding. Therefore, for editing templates it is recommended to use, for example, Notepad++.
User templates should be placed into Documents folder (usually %UserProfile%\Documents\OpenNumismat\templates). Each template is in a separate subfolder, the name of which is used as the template name.
Examples of templates can be found in the program folder (usually C:\Program Files\OpenNumismat\templates) or in the source codes.
The main template file name must be coins.htm. If coin.htm is present, it will be used as a template for generating a report for a single coin. Also, if a report is generated for multiple coins, it will be used for each individual coin, in addition to the overall report based on the coins.htm template.
The context variables records and titles are passed to the generator. titles contains the names of the fields to display (e.g. {{titles.subjectshort}} - Subject).
records - an array of all coins to display. Each array element contains one coin with all fields (e.g. {{records[0].subjectshort}} - Subject of first coin). The correspondence of fields can be found in the table.
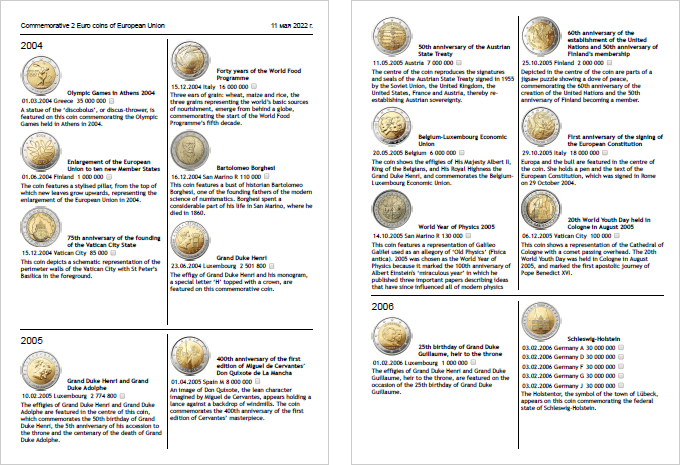
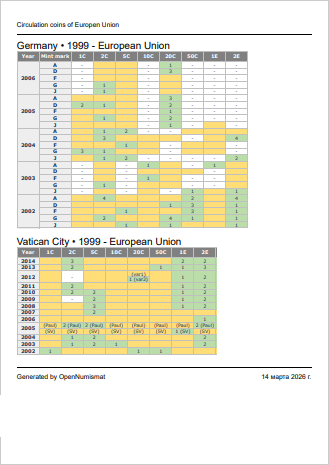
6.4 Report template examples
Commemoratives_ByCountry
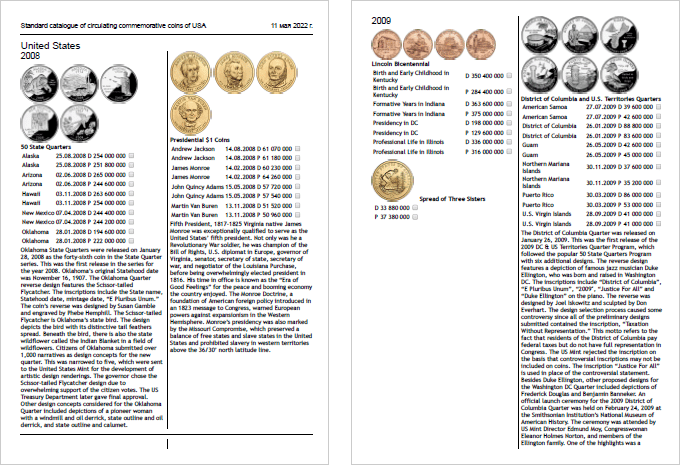
Commemoratives_ByYear
holders
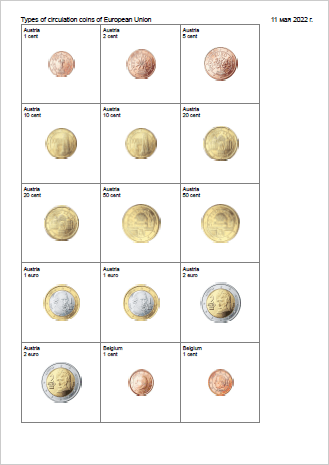
Circulation
6.5 Exporting the Table of coins
OpenNumismat allows you to save the current Table of coins with all applied filters and sorting in a separate file in MS Excel, HTML or CSV format (Note: in the current implementation, images are not exported).
You can export the Table of coins in the menu Report → Save current list.... In the opened dialog select the file name, the required format and save the file.
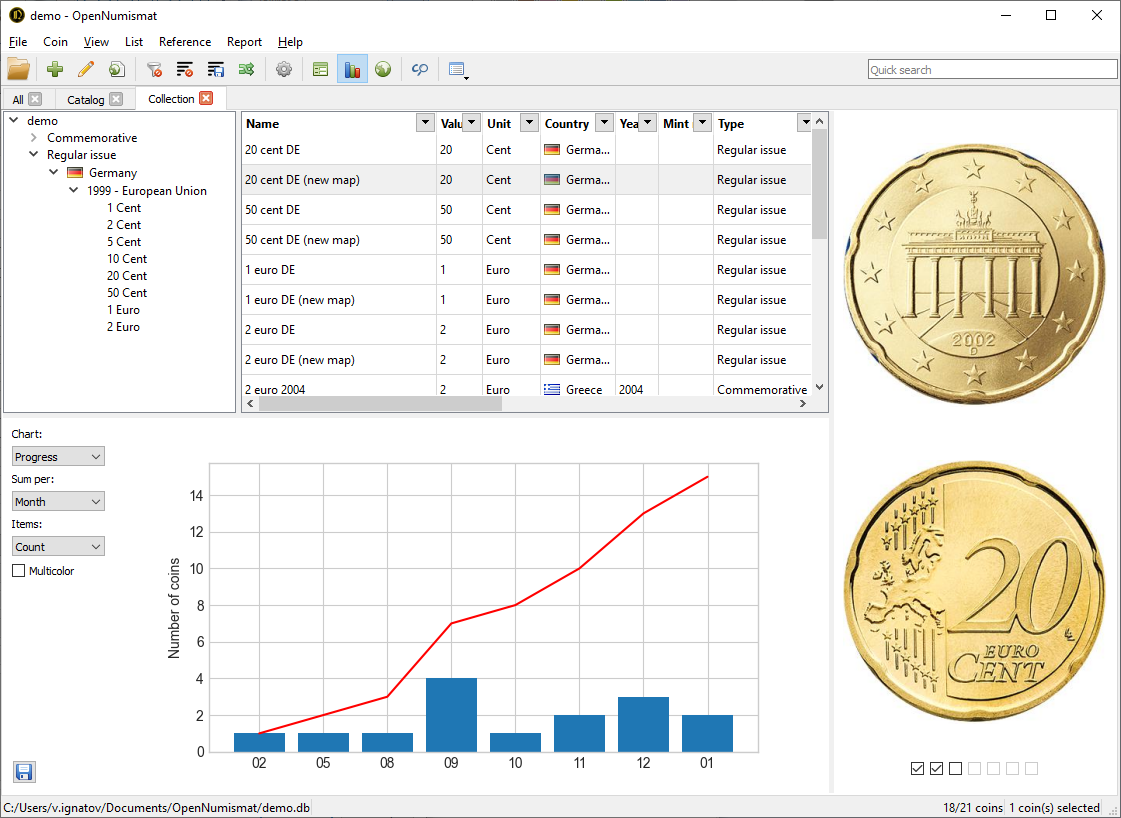
6.6 Statistics
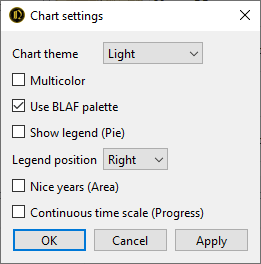
Screenshots of example statistics charts.
Additional settings for statistics charts:
Also for create any diagram and calculating statistics you can use MS Excel. Copy coins that you need from OpenNumismat to MS Excel or export Table of coins to MS Excel file (see 6.5) and use its functionality.
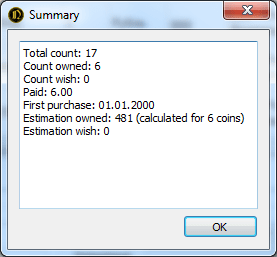
6.7 Summary
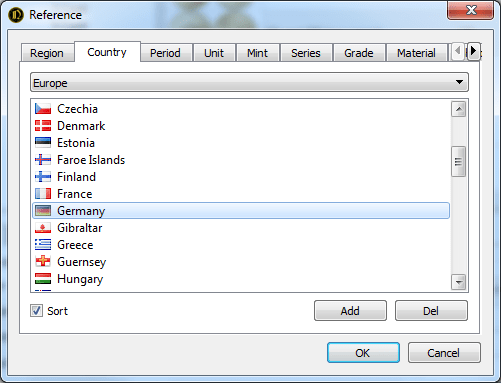
7 Tercihler
References make it easy to enter data when editing a coin, and also add icons (such as flags) to the data display. References are available for the following fields: Region, Country, Period, Ruler, Unit, Mint, Series, Grade, Material, Shape, Quality, Edge, Rarity, ObvRev, Type, Defect, Place (purchase or sale).
Editing references is available from the Edit dialog:
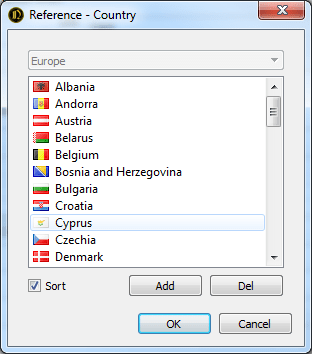
or from menu Reference → Edit...:
Right-clicking on the entry in the reference opens access to adding or deleting the item's icon:

References for Country, Period, Ruler, Unit, Mint, Series is a cross-references and their updating is available only if you select the value of the base field that exists in the reference. For example, to add a new mint, you should first select an existing country.
The Sort check box sorts all the entries in the reference, otherwise all items will be displayed in the order they were entered. This order can be changed by Move up/Move down in context menu.
To quickly fill references with entered data from the collection, select the Reference → Fill from collection menu.
By default, references are stored in a separate file with a .ref extension, which can be copied, renamed or deleted by means of your OS. The path to the references file can be specified in the Settings dialog.
Also you can attach current reference to a collection file. Select Reference → Attach current reference for attaching or Reference → Detach current reference for remove reference from collection and use default from Settings.
You can customize default reference with Reference generator.
8 Ayarlar
The Settings dialog allows you to configure the appearance and behavior of the application. To open the dialog, select the menu File → Settings.
8.1 Main
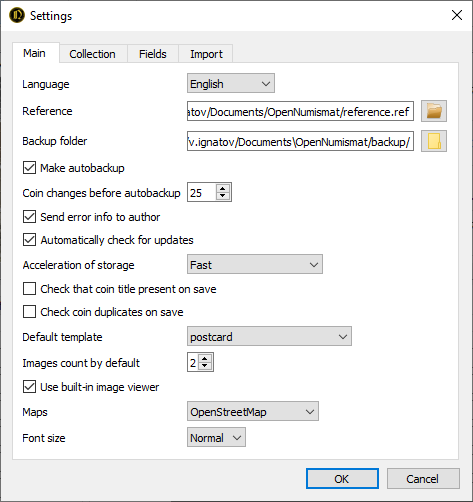
Yedekleme klasörü
The folder where backups will be saved. See 5.2.
Make autobackup after record changes
You can enable autobackup. This feature will make backups upon closing the collection after changing specified count of records.
Geliştiriciye hata bilgisini gönder
Enabling this flag allows internal error information to be sent to the author's website. This helps improve OpenNumismat. To better understand and quickly fix the error, please include a description of when the error occurs.
Depolama hızlandırması
The SQLite database engine have a multiple settings that affect the speed and reliability:
- Güvenli - tüm değişikliklerin kaydedileceği güvence altındadır.
- Fast - changes can be lost when power is turned off during operation (recommended for most cases);
- Extra fast (dangerous) - recommended when you perform a large number of changes, provided that you perform a backup.
Use webcam
Allows the use of a webcam for scanning barcodes or capturing images in the Image Editor.
Show counters in Tree and Statistics
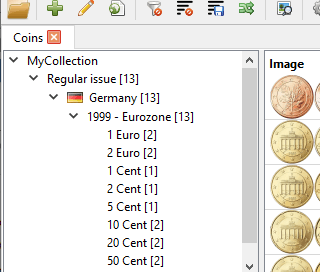
Image background color
When adding an image with a transparency or removing background in the Image Editor, the background will be replaced with the specified color.
8.2 Collection
Collection specific settings (stored for each collection file):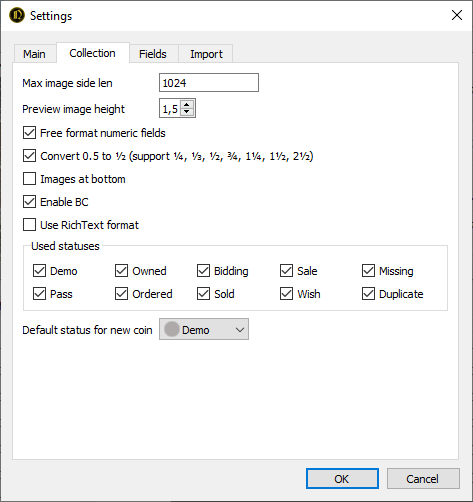
Max image side len, Image quality
These settings control images in the collection file and affect its size.
Setting Max image side len to 0 will preserve the original size.
Setting Image quality to 100% will use lossless compression.
Decreasing Max image side len or Image quality allows to recalculate all images in collection to reduce collection file size (see 5.3).
Önizleme görsel yüksekliği
Görseller altta
Swaps the Image and Info panels.
Nümerik alanlar için özgür format
For entering values in the expanded format (question mark in the Year field, fractions in the Nominal field, range in the Weight field, etc.).
Sort Tree by references
When this setting is enabled, items in the Tree will be sorted according to their position in the reference (see 7). When two fields are combined in the Tree, sorting is performed first by the right-hand field.
8.3 Fields
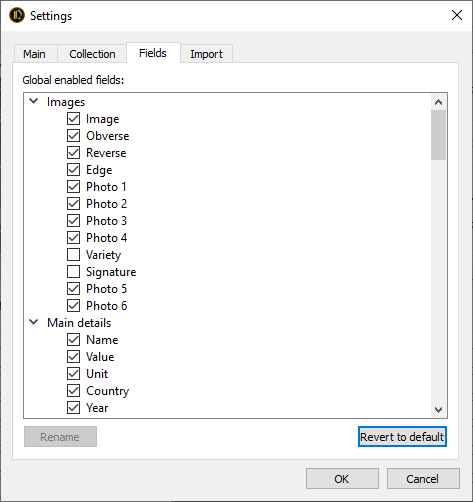
The Fields panel of the settings dialog allows you to rename and remove part of the collection fields from the interface. In this case only the selected fields will be displayed in the program interface, but the data will be saved for all fields.
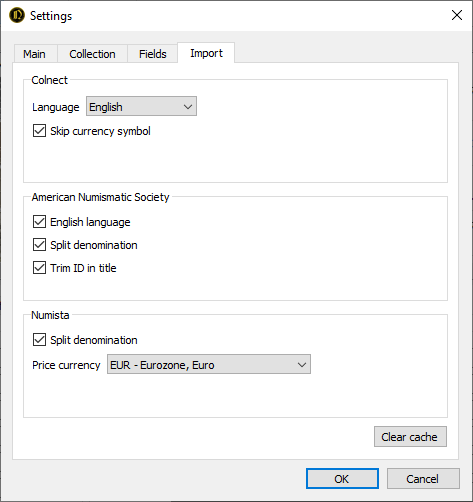
8.4 Import
9 Image Editor
OpenNumismat has a built-in Image Editor (main project is https://github.com/OpenNumismat/ImageEditor), which can be enabled from Settings.
Özellikler
- Supports popular image formats: JPEG, PNG, BMP, TIFF, GIF, WebP
- Capture a photo from webcam (for better results try Camo)
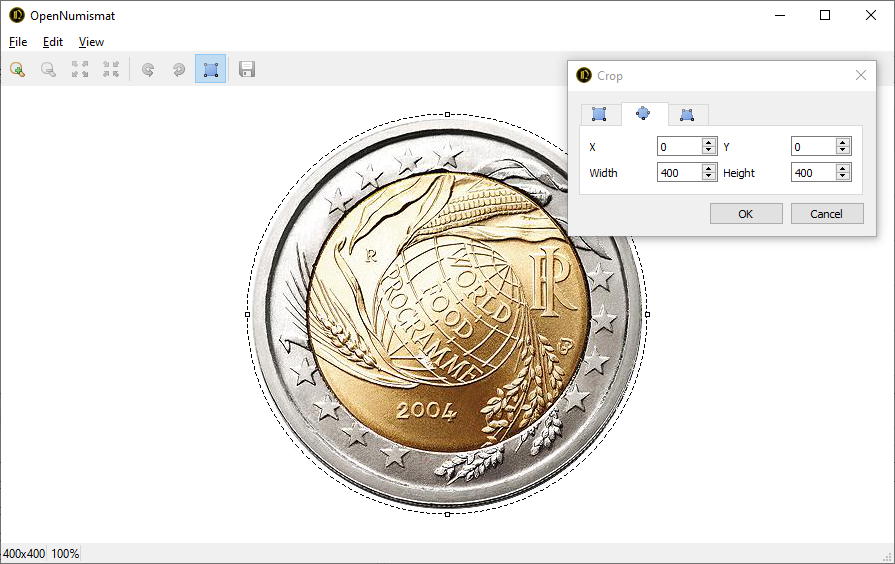
- Image editing tools: resize, rotate, crop (rectangle, ellipse, perspective transformation)
- Remove background with rembg
- Up to 10 Undo/Redo actions
- Single click to switch between best fit and actual size mode
- Full Screen mode
- Mouse wheel zoom
- Navigating through images in a record and through the records themselves
Keyboard Shortcuts
Ctrl + O — Open file
Ctrl + S — Save
Ctrl + C, Ctrl + Insert — Copy
Ctrl + V, Shift + Insert — Paste
Ctrl + Z — Undo
Ctrl + Y — Redo
Alt + ← — Rotate to left
Alt + → — Rotate to right
C — Open crop tool
R — Open rotate tool
B — Remove background with AI
Ctrl + ← — Previous image
Ctrl + → — Next image
Ctrl + ↑ — Previous record
Ctrl + ↓ — Next record
+ — Zoom in
- — Zoom out
0 — Fit to window
1, A — Scale 100%
2 — Scale 200%
3 — Scale 300%
4 — Scale 400%
5 — Scale 500%
6 — Scale 600%
F11 — Full screen
Esc — Quit
Mouse wheel upward — Zoom in
Mouse wheel downward — Zoom out
Mouse left button dbl click — Zoom in
Mouse middle button click — Zoom in
Mouse right button dbl click — Zoom out
Ayarlar
Image Editor settings are available under File → Settings.
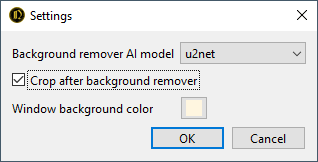
Available background remover AI models:
| İsim | Açıklama | Feature | Estimated time per image, s | Model size, Mb |
|---|---|---|---|---|
| u2net | pre-trained model for general use cases | optimal | 4.1 | 171 |
| silueta | same as u2net but the size is reduced to 43Mb | fastest | 1.4 | 43 |
| isnet-general-use | new pre-trained model for general use cases | 3.3 | 174 | |
| birefnet-general | pre-trained model for general use cases | best quality | 66.8 | 949 |
| birefnet-general-lite | light pre-trained model for general use cases | high quality | 21.5 | 218 |
The AI model will be downloaded automatically upon first use.